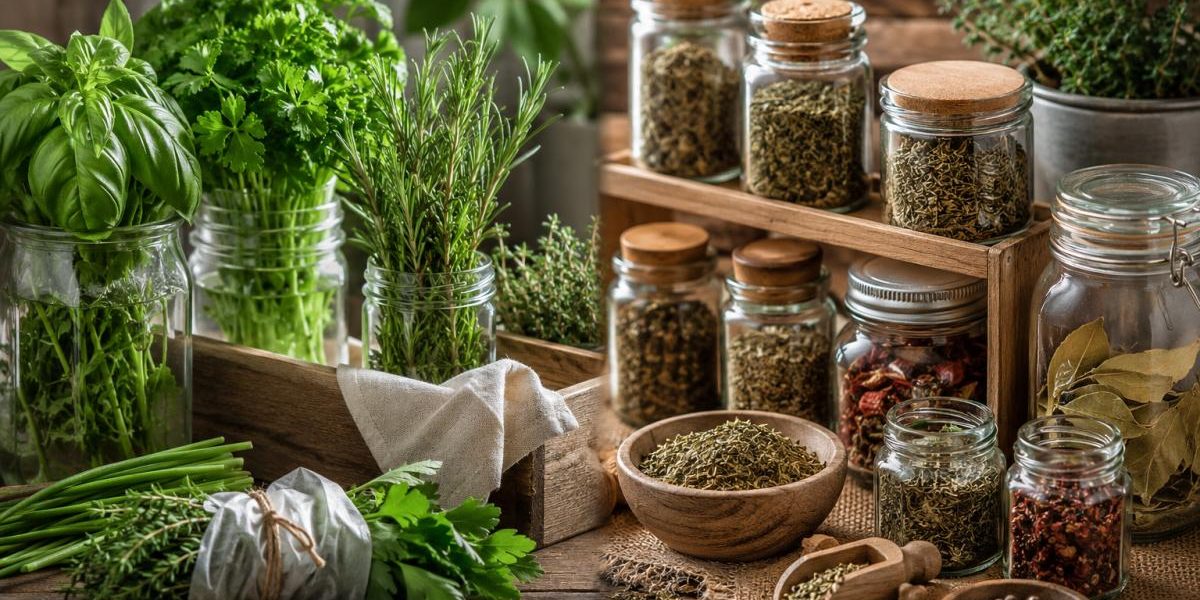
 The Green Chef
Every gardener knows the feeling: one week, you’re waiting for your herbs to grow, and the next, you have more rosemary, thyme, and oregano than you know what to do with. While exploring creative ways to make the most of my harvest, I came across Air Fryer Faz Tudo article, which opened my eyes to a surprisingly practical use for an appliance I already had in my kitchen. What started as a simple attempt to avoid wasting fresh herbs gradually became an affordable, rewarding routine that helped me preserve my garden’s flavors, build a homemade herb supply, and save money throughout the year.
The Small Gardening Problem That Changed the Way I Preserve Herbs
There’s a certain satisfaction in stepping outside, picking a few fresh herbs, and bringing them straight into the kitchen.
For me, that’s one of the most rewarding parts of growing an herb garden.
A few leaves of basil can transform a simple tomato salad. Fresh rosemary makes roasted potatoes smell incredible. And a handful of thyme can add character to almost any homemade meal.
But herb gardening comes with a familiar problem.
Sometimes, everything seems to grow at once.
During the warmer months, a healthy rosemary plant can produce far more than a household needs. Oregano spreads enthusiastically, mint keeps producing new leaves, and thyme can provide generous harvests when growing conditions are right.
At first, I treated this abundance as a temporary luxury.
I’d pick what I needed, give some away, and leave the rest growing.
But occasionally, perfectly good herbs would pass their best harvesting stage before I had found a use for them.
That’s when I became interested in preserving them.
I knew about hanging herbs to dry, and I understood that food dehydrators were designed for the job.
What surprised me was discovering that certain air fryers could also work as compact dehydrators.
Not every model, of course. The important feature is a genuine low-temperature dehydration setting.
But when an appliance offers that capability, it can become a useful tool for turning a seasonal garden harvest into something available throughout the year.
And once I started thinking about my herbs as a resource to preserve rather than something I had to use immediately, my gardening habits began to change.
Why Drying Herbs Makes So Much Sense for Home Gardeners
Fresh herbs are wonderful, but their freshness is temporary.
Once harvested, delicate leaves can wilt quickly, particularly if they aren’t stored properly.
Drying offers a different possibility.
By removing enough moisture, we can preserve many culinary herbs for later use while significantly reducing the space they occupy.
Instead of needing an entire container of fresh oregano, I can keep a small jar of dried leaves in my pantry.
A large handful of fresh thyme becomes a compact supply of seasoning.
And the rosemary that grows so generously during the gardening season can continue adding flavor to meals long after the main harvest has ended.
What I appreciate most is the sense of independence.
I no longer have to rely entirely on supermarket herb jars for every recipe.
The garden becomes a source of ingredients that can be collected, preserved, labeled, and used when needed.
There’s also something deeply satisfying about opening a jar and knowing exactly where those herbs came from.
I planted them, cared for them, harvested them, and preserved them.
That connection between gardening and cooking is what makes the process feel worthwhile.
Can You Really Dry Herbs in an Air Fryer?
Yes, but there’s an important distinction that every gardener should understand.
An air fryer is suitable for drying herbs only when the model supports food dehydration at an appropriately low temperature and its manufacturer allows lightweight herbs to be dehydrated safely.
Regular air-frying temperatures are generally far too high for preserving delicate herbs.
Instead of gently removing moisture, excessive heat can cook, scorch, or damage the leaves, reducing their flavor, aroma, and color.
Food-preservation guidance commonly recommends drying herbs at approximately 95–115°F (35–46°C).
That’s considerably lower than the temperatures used for crispy potatoes or roasted vegetables.
Some multi-function air fryers include a dedicated dehydration program capable of operating within this range.
Others cannot reach such low temperatures.
If your appliance doesn’t offer a suitable setting, I would recommend using a food dehydrator or a reliable traditional air-drying method instead.
There’s another detail worth checking: airflow.
Air fryers often have powerful fans, and small leaves can move around inside the cooking chamber.
An appliance should have manufacturer-approved trays or accessories that keep herbs securely positioned without blocking ventilation.
Loose leaves must never be allowed to blow toward the heating element.
Once those conditions are met, dehydrating garden herbs can be surprisingly straightforward.
Which Garden Herbs Are Worth Drying?
Not every culinary herb behaves the same way when dried.
Some retain much of their recognizable aroma, while others are more enjoyable fresh or frozen.
After considering how often I actually use each herb in the kitchen, I would prioritize the following varieties.
Rosemary: The Herb I Always Want in Stock
Rosemary is one of my favorite examples of why preserving herbs makes sense.
Its firm, needle-like leaves have a distinctive aroma that works beautifully with roasted potatoes, vegetables, bread, and many savory dishes.
It’s also an herb that generally retains its character well after drying.
That makes it particularly useful for creating a pantry reserve.
Instead of buying small jars repeatedly, I can preserve suitable harvests from a healthy plant and use them gradually.
For me, rosemary represents the ideal connection between gardening and practical cooking.
Thyme: Small Leaves, Plenty of Flavor
Thyme is another excellent candidate for drying.
Its tiny leaves may look delicate, but their characteristic fragrance remains useful in soups, sauces, vegetable dishes, and homemade seasoning blends.
Because the leaves are small, harvesting and storing thyme doesn’t require much space.
Once properly dried, a modest jar can provide many uses.
I particularly like the idea of having thyme available during colder months when fresh garden growth may be limited.
Oregano: A Pantry Essential from the Garden
Oregano is one of the most rewarding herbs to preserve.
Its flavor is familiar in tomato sauces, roasted vegetables, pizza, Mediterranean-inspired dishes, and seasoning mixtures.
Drying oregano can produce a concentrated herb that’s convenient to sprinkle directly into food.
It’s also particularly satisfying to preserve a plant that can produce generous amounts of foliage during the growing season.
Sage: A Little Goes a Long Way
Sage has a bold aroma that can complement poultry, squash, beans, and butter-based sauces.
Because its flavor is strong, small amounts can be enough for many recipes.
Preserving some of the harvest makes it possible to enjoy the plant beyond its most productive growing period.
Mint: A Useful Addition Beyond Savory Cooking
Mint deserves a place in the herb-preservation conversation, too.
Depending on the variety, dried mint can be useful in herbal teas and certain culinary preparations.
It may lose some of its fresh brightness, but it can still be a worthwhile herb to preserve.
I would keep dried mint in a separate, clearly labeled jar to prevent its strong aroma from dominating other herbs.
What About Basil, Parsley, and Chives?
These herbs can also be dried, but their flavors often change noticeably.
Basil may lose some of its fresh, vibrant character, while parsley and chives can become less distinctive after drying.
For these herbs, freezing is sometimes a better option when preserving fresh flavor is the priority.
That’s one of the things gardening has taught me: preservation works best when we choose the method that suits the plant, rather than expecting every herb to behave identically.
How I Would Turn a Fresh Herb Harvest into Dried Seasoning
One reason I like this approach is that the process doesn’t need to be complicated.
It can fit naturally into a regular gardening day.
Step 1: Harvest Healthy Herbs
I would begin by harvesting healthy leaves and tender stems, preferably when the plants are dry.
Avoid leaves showing signs of disease, mold, insect damage, or chemical contamination.
I also prefer harvesting modest amounts rather than cutting everything at once.
That gives the plants a chance to continue growing, when the species and season allow it.
Step 2: Sort and Clean the Harvest
Remove damaged leaves and unwanted stems.
If the herbs need washing, rinse them gently with clean water.
Then remove as much surface moisture as possible using a salad spinner, clean towel, or paper towels.
This step matters because excess water can slow the drying process.
Step 3: Check the Air Fryer’s Dehydration Settings
Before using the appliance, confirm that it has a suitable dehydration mode.
The commonly recommended herb-drying range is 95–115°F (35–46°C).
I would also check the manufacturer’s instructions for approved trays, maximum quantities, and safe handling of lightweight leaves.
Never cover the basket or fan with improvised materials to hold herbs in place.
If the model doesn’t support safe herb dehydration, use another method.
Step 4: Arrange Herbs in a Thin Layer
Place the prepared herbs on the approved dehydration tray in a thin, uncrowded layer.
Good airflow helps moisture escape.
Large piles of herbs can prevent even drying, leaving some leaves dry while others remain damp.
Smaller batches may be more convenient, especially when preserving different varieties.
Step 5: Dry Slowly and Check the Texture
With a suitable low-temperature dehydration program, herbs may take several hours to dry completely.
Many dehydrator guidelines suggest approximately 1–4 hours for herbs, although the actual time can vary significantly.
Leaf thickness, humidity, harvest size, and the appliance all influence the process.
Rather than relying exclusively on a timer, I’d look for the proper final texture.
Leaves should feel crisp and crumble readily.
Thicker stems should snap rather than bend.
If the herbs still feel soft, cool, or flexible, they may retain too much moisture for safe storage.
Step 6: Cool, Label, and Store
Allow the completely dried herbs to cool before packaging.
I prefer the idea of using small, clean, dry glass jars with airtight lids.
Each jar should be labeled with the herb’s name and harvest or drying date.
Store the jars somewhere cool, dark, and dry, away from the stove and direct sunlight.
Leaving leaves whole until they’re needed can help retain their aroma.
And before putting any dried harvest into long-term storage, it’s essential to be confident that all parts are thoroughly dry.
My Favorite Part: Building a Small Herb Pantry
Once I began thinking seriously about preserving herbs, the idea of a homegrown herb pantry became incredibly appealing.
Not a huge collection of dozens of identical jars.
Just a useful selection of seasonings that I regularly cook with.
Rosemary for potatoes and vegetables.
Thyme for soups and savory dishes.
Oregano for tomato sauces.
Sage for autumn-inspired meals.
Mint for tea.
I find the idea of this small collection much more satisfying than buying an entire packet of fresh herbs, using a few leaves, and watching the rest wilt.
And it doesn’t require a large property.
Even a few herb plants in containers on a patio, balcony, or sunny windowsill can contribute to a modest pantry, provided the plants are grown successfully.
Of course, a small garden won’t necessarily produce enough to meet every household’s needs.
But it doesn’t have to.
I think one of the most rewarding goals in gardening is making gradual improvements that are achievable and sustainable.
A few jars of homegrown herbs can be a perfectly worthwhile beginning.
Does Drying Your Own Herbs Actually Save Money?
This is where the practical side becomes especially interesting.
Dried herbs are sold in small quantities, and purchasing several different varieties throughout the year can add up.
If you’re already growing herbs successfully, preserving the surplus allows you to get more value from plants you’ve invested time and resources in cultivating.
The financial benefits can come from several directions.
First, you’re reducing waste.
Instead of allowing excess harvests to deteriorate, you’re saving them for future meals.
Second, you’re potentially reducing purchases of packaged dried herbs.
Third, you’re making better use of plants that may continue producing throughout the season.
However, I wouldn’t claim that home dehydration always saves money.
There are costs involved.
Seeds or young plants, potting soil, water, containers, electricity, and gardening supplies all have a price.
The air fryer itself may also represent a significant investment.
And for someone drying only a few teaspoons of herbs each year, purchasing a small supermarket jar could be less expensive.
A Simple Way to Think About the Savings
Imagine you already own a suitable air fryer and have several productive herb plants.
Your additional preservation costs might include electricity, storage jars, and a small amount of time.
If you reuse jars and harvest herbs that would otherwise go to waste, those extra expenses may be quite modest.
For electricity, you can estimate the cost with a simple formula:
Electricity cost = average power consumption (kW) × hours of operation × electricity price per kWh
For example, if an appliance averages 0.3 kW during a three-hour dehydration cycle and electricity costs $0.20 per kWh, the estimated energy cost would be $0.18.
That’s only an illustration, not a measured consumption figure for a specific air fryer. Actual power use varies by appliance and setting.
The more useful question is whether the resulting dried herbs replace purchases you would otherwise have made.
If they do, and the total costs are lower, the process can offer real savings.
For me, the biggest attraction isn’t making a profit.
It’s making the garden more productive and the household a little less wasteful.
Why Small Batches Make Preserving Herbs Easier
One mistake I think gardeners can make is waiting until the end of the season to preserve everything.
By then, some plants may have passed their ideal harvesting stage.
Others may have started flowering, lost quality, or suffered from weather changes.
A simpler approach is to preserve small amounts during the growing season.
Whenever a plant produces more than I expect to use fresh, I can set aside a modest harvest for drying.
This approach has several advantages.
It’s easier to sort and inspect the leaves.
There’s less material to dry at once.
The batches can be kept separate and labeled accurately.
And the task feels like a manageable part of ordinary garden maintenance rather than a major preservation project.
For a small-scale gardener, that convenience can make the difference between occasionally preserving herbs and doing it regularly.
How Herb Drying Became Part of My Gardening Routine
The most interesting change wasn’t discovering a new appliance feature.
It was beginning to think differently about harvesting.
Instead of asking, “What can I cook with these herbs today?” I started thinking, “Which herbs should I preserve for the coming months?”
That small shift can change how we manage an herb garden.
I like the idea of walking around the plants once or twice a week and paying attention to their growth.
Is the oregano becoming too dense?
Does the thyme need a light trim?
Is there enough rosemary to harvest a few sprigs without affecting the plant’s health?
These simple observations encourage regular garden care.
And when there’s a suitable surplus, preserving it becomes part of the routine.
Not every week needs to involve dehydration.
Sometimes there’s nothing to harvest.
Sometimes the fresh herbs are needed for cooking.
And sometimes freezing or another preservation method makes more sense.
But knowing that the option exists helps me feel more organized.
Instead of rushing to use everything, I can make decisions based on what the plants actually produce.
That’s a surprisingly enjoyable way to garden.
What I’ve Learned About Keeping Dried Herbs Fresh
Successfully drying herbs is only half the process.
The other half is storing them properly.
Even completely dried herbs gradually lose aroma and flavor over time.
Heat, light, air, and moisture can accelerate that decline.
That’s why I prefer smaller containers rather than keeping a year’s worth of herbs in a large jar that gets opened constantly.
It’s also worth remembering that dried herbs should be kept away from steam.
Shaking herbs directly from a storage jar over a boiling pot can introduce moisture into the container.
A better habit is to measure the amount needed away from the stove and then return the jar to storage.
If condensation, unusual moisture, or mold appears inside a container, the affected herbs should be discarded rather than used.
And while properly dried herbs can remain usable for quite some time under suitable conditions, their best flavor won’t last indefinitely.
I would rather preserve manageable quantities and refresh my supply with each growing season.
That makes the pantry easier to organize and encourages me to keep gardening.
Is an Air Fryer Better Than Air-Drying Herbs Naturally?
Not necessarily.
Traditional air-drying is still an excellent option for certain herbs, particularly sturdy varieties such as rosemary, thyme, and oregano.
It requires little equipment and no electricity.
In suitable conditions, small bundles can be hung in a dry, well-ventilated location away from direct sunlight.
A dedicated food dehydrator offers another advantage: it is specifically designed to maintain gentle heat and airflow for removing moisture.
An air fryer with a genuine dehydration function sits somewhere between convenience and specialization.
It may be a useful option for gardeners who already own a compatible model and want to preserve small harvests without purchasing another appliance.
But it’s not automatically superior.
A dedicated dehydrator may be better for large quantities.
Natural air-drying may be more economical for suitable herbs in a dry environment.
And freezing may preserve certain delicate flavors better.
I think the most sensible approach is to choose the preservation method based on the herb, the harvest size, the equipment available, and the intended use.
Gardening should be practical, not unnecessarily complicated.
Frequently Asked Questions About Drying Garden Herbs in an Air Fryer
Can you dry fresh herbs in an air fryer?
Yes, if the appliance has an appropriate low-temperature dehydration setting and the manufacturer allows herbs to be dehydrated safely. Standard high-temperature air-frying programs are generally unsuitable.
What temperature is best for drying herbs?
Food-preservation recommendations commonly suggest approximately 95–115°F (35–46°C). A model that cannot operate safely within a suitable low-temperature range should not be used as a substitute for a food dehydrator.
Which herbs are best for drying?
Rosemary, thyme, oregano, sage, and mint are commonly suitable choices. Basil, parsley, and chives can also be dried, although freezing may better preserve some of their fresh flavors.
How long does it take to dry herbs in an air fryer?
With a compatible dehydration setting, it may take several hours. The exact duration depends on the herb, moisture content, airflow, load size, and appliance. Complete dryness is more important than following a fixed time.
How do you know when dried herbs are ready to store?
The leaves should be completely dry and crumble easily. Stems should snap rather than bend. Any remaining moisture can increase the risk of mold during storage.
How should homemade dried herbs be stored?
Keep them in clean, dry, airtight containers in a cool, dark location. Label the containers with the herb name and drying date, and protect them from moisture and heat.
Is drying your own garden herbs cheaper than buying them?
It can be, especially if you already grow the herbs, own compatible equipment, and use the dried harvest to replace purchases. Actual savings depend on growing costs, electricity, storage supplies, yield, and how much you normally spend on herbs.
Can you dry herbs in an air fryer without a dehydrator setting?
It’s generally better not to. Many standard air fryers operate at temperatures too high for quality herb drying, and powerful fans can move lightweight leaves into unsafe positions. Air-drying or using a dedicated dehydrator is a better alternative.
Conclusion: A Small Habit That Makes My Garden More Rewarding
When I first started growing herbs, the greatest satisfaction came from using them fresh.
I loved the convenience of picking rosemary, thyme, or oregano directly from the garden and bringing those flavors into the kitchen.
But over time, I began appreciating something else.
A productive herb garden doesn’t have to be enjoyed only during the growing season.
With the right preservation method, some of that harvest can be saved for later.
And for gardeners who already own an air fryer with a suitable dehydration function, drying small batches can become an accessible part of that process.
It helps reduce waste, creates a useful supply of homemade seasonings, and may lower the need to purchase packaged herbs.
More importantly, it encourages us to pay closer attention to what our gardens produce.
What began as a practical solution for surplus herbs can become a regular habit of harvesting, preserving, and using ingredients more thoughtfully.
I still love fresh herbs, and I wouldn’t want to replace them entirely.
But there’s something deeply satisfying about opening a jar of dried rosemary in the middle of winter and knowing it came from a plant I cared for months earlier.
For me, that’s the real value of preserving garden herbs: turning a short-lived harvest into something useful, economical, and enjoyable long after the growing season has passed.
And sometimes, the most rewarding improvements to our gardening routine begin with something as simple as deciding not to waste what we’ve already grown.